关于Nginx 用户认证、SSL证书生成配置的一些笔记
用户认证
安装 nginx ,配置 nginx 的用户认证
┌──[root@vms152.liruilongs.github.io]-[~]
└─$rpm -ql nginx || yum -y install  nginx
安装版本
┌──[root@vms.154.liruilongs.github.io]-[/etc/pki/nginx]
└─$nginx -v
nginx version: nginx/1.20.1
备份修改配置文件
┌──[root@vms.154.liruilongs.github.io]-[~]
└─$cp /etc/nginx/nginx.conf  /etc/nginx/nginx.conf.bak
┌──[root@vms.154.liruilongs.github.io]-[~]
└─$vim /etc/nginx/nginx.conf
认证需要 在配置文件 server 模块下面添加对应的配置,auth_basic为提示信息,auth_basic_user_file 为账密文件位置
server {
    ...........
    auth_basic "auth-liruilong";
    auth_basic_user_file /etc/nginx/pass;
安装压测工具,http-tools 可以创建访问网站的用户名和密码
┌──[root@vms.154.liruilongs.github.io]-[~]
└─$yum -y install  httpd-tools
......
┌──[root@vms.154.liruilongs.github.io]-[~]
└─$htpasswd -c /etc/nginx/pass liruilong
New password:
Re-type new password:
Adding password for user liruilong
启动服务,确认服务启动
┌──[root@vms.154.liruilongs.github.io]-[~]
└─$systemctl start  nginx
┌──[root@vms.154.liruilongs.github.io]-[~]
└─$systemctl is-active nginx
active
访问测试
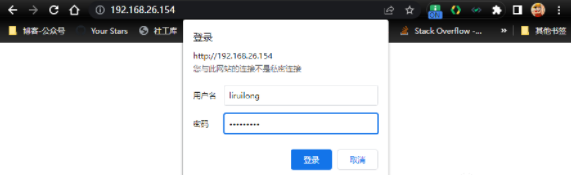
- -
SSL 虚拟主机配置
修改配置文件,需要把注释的部分放开,然后在配置文件的指定的位置创建 SSL 相关密钥,证书
┌──[root@vms.154.liruilongs.github.io]-[/etc/pki/nginx]
└─$cat /etc/nginx/nginx.conf
#For more information on configuration, see:
 # * Official English Documentation: http://nginx.org/en/docs/
 #  Official Russian Documentation: http://nginx.org/ru/docs/

user nginx;
worker_processes auto;
error_log /var/log/nginx/error.log;
pid /run/nginx.pid;

# Load dynamic modules. See /usr/share/doc/nginx/README.dynamic.
include /usr/share/nginx/modules/*.conf;

events {
worker_connections 1024;
}

http {
log_format  main  '$remote_addr - $remote_user [$time_local] "$request" '
                  '$status $body_bytes_sent "$http_referer" '
                  '"$http_user_agent" "$http_x_forwarded_for"';

access_log  /var/log/nginx/access.log  main;

sendfile            on;
tcp_nopush          on;
tcp_nodelay         on;
keepalive_timeout   65;
types_hash_max_size 4096;

include             /etc/nginx/mime.types;
default_type        application/octet-stream;

# Load modular configuration files from the /etc/nginx/conf.d directory.
# See http://nginx.org/en/docs/ngx_core_module.html#include
# for more information.
include /etc/nginx/conf.d/*.conf;


# Settings for a TLS enabled server.

server {
    listen       443 ssl http2;
    listen       [::]:443 ssl http2;
    server_name  _;
    root         /usr/share/nginx/html;

    ssl_certificate "/etc/pki/nginx/server.crt";
    ssl_certificate_key "/etc/pki/nginx/private/server.key";
    ssl_session_cache shared:SSL:1m;
    ssl_session_timeout  10m;
    ssl_ciphers HIGH:!aNULL:!MD5;
    ssl_prefer_server_ciphers on;

    # Load configuration files for the default server block.
    include /etc/nginx/default.d/*.conf;

    error_page 404 /404.html;
        location = /40x.html {
    }

    error_page 500 502 503 504 /50x.html;
        location = /50x.html {
    }
}

}

┌──[root@vms.154.liruilongs.github.io]-[/etc/pki/nginx]
└─$
创建 ssl 认证相关
┌──[root@vms.154.liruilongs.github.io]-[/etc/nginx/conf.d]
└─$mkdir -p /etc/pki/nginx/
┌──[root@vms.154.liruilongs.github.io]-[/etc/pki/nginx]
└─$mkdir private
┌──[root@vms.154.liruilongs.github.io]-[/etc/pki/nginx]
└─$cd private
生成 RSA 和 ECDSA 密钥
生成生成 RSA 密钥,服务器私钥用于对报文进行解密
┌──[root@vms.154.liruilongs.github.io]-[/etc/pki/nginx/private]
└─$openssl genrsa -out server.key 2048
Generating RSA private key, 2048 bit long modulus
......+++
................+++
e is 65537 (0x10001)
┌──[root@vms.154.liruilongs.github.io]-[/etc/pki/nginx/private]
└─$cd ..
其他可选项
生成 RSA 密钥:
openssl genrsa -out example.key [bits]
打印 RSA 密钥的文本表示:
openssl rsa -in example.key -text -noout
生成新的 RSA 密钥并使用基于 AES CBC 256 加密的密码短语进行加密:
openssl genrsa -aes256 -out example.key [bits]
检查您的私钥。如果密钥有密码短语,系统会提示您输入密码:
openssl rsa -check -in example.key
从密钥中删除密码:
openssl rsa -in example.key -out example.key
使用密码短语加密现有私钥:
openssl rsa -des3 -in example.key -out example_with_pass.key
生成 ECDSA 密钥。curve 将替换为:prime256v1、secp384r1、secp521r1 或任何其他支持的
openssl ecparam -genkey -name [curve] | openssl ec -out example.ec.key
创建证书签名请求(CRS)
从现有私钥创建 CSR
┌──[root@vms.154.liruilongs.github.io]-[/etc/pki/nginx]
└─$ls
private
┌──[root@vms.154.liruilongs.github.io]-[/etc/pki/nginx]
└─$openssl req -new -key ./private/server.key -out server.csr -subj "/CN=192.168.26.1"
可选项
在单个命令中创建没有密码短语的 CSR 和私钥:
openssl req -nodes -newkey rsa:[bits] -keyout example.key -out example.csr
在命令行上提供 CSR 主题信息,而不是通过交互式提示。
openssl req -nodes -newkey rsa:[bits] -keyout example.key -out example.csr -subj "/C=UA/ST=Kharkov/L=Kharkov/O=Super Secure Company/OU=IT Department/CN=example.com"
从现有证书和私钥创建 CSR:
openssl x509 -x509toreq -in cert.pem -out example.csr -signkey example.key
通过提供 openssl 配置文件为多域 SAN 证书生成 CSR:
openssl req -new -key example.key -out example.csr -config req.conf
配置文件 req.conf:
[req]
prompt=no
default_md = sha256
distinguished_name = dn
req_extensions = req_ext
[dn]
CN=example.com
[req_ext]
subjectAltName= @alt_names
[alt_names]
DNS.1=example.com
DNS.2=www.example.com
DNS.3=ftp.example.com
创建 X.509 证书
生成证书,使用现有的 CSR 和私钥创建自签名证书:
┌──[root@vms.154.liruilongs.github.io]-[/etc/pki/nginx]
└─$openssl x509 -req -days 3650 -in server.csr -signkey ./private/server.key -out server.crt
Signature ok
subject=/CN=192.168.26.1
Getting Private key
┌──[root@vms.154.liruilongs.github.io]-[/etc/pki/nginx]
└─$ls
private  server.crt  server.csr
┌──[root@vms.154.liruilongs.github.io]-[/etc/pki/nginx]
└─$
可选项
这里也可以从头开始创建自签名证书和新私钥:
openssl req -nodes -newkey rsa:2048 -keyout example.key -out example.crt -x509 -days 365
使用您自己的“CA”证书及其私钥签署子证书。如果您是一家 CA 公司,这将显示一个关于如何颁发新证书的非常简单的示例。
openssl x509 -req -in child.csr -days 365 -CA ca.crt -CAkey ca.key -set_serial 01 -out child.crt
打印证书的文本表示
openssl x509 -in server.crt -text -noout
将证书的指纹打印为 md5、sha1、sha256 摘要:
openssl x509 -in cert.pem -fingerprint -sha256 -noout
验证 CSR 或证书
验证 CSR 签名:
openssl req -in example.csr -verify
验证私钥是否与证书和 CSR 匹配:
openssl rsa -noout -modulus -in example.key | openssl sha256
openssl x509 -noout -modulus -in example.crt | openssl sha256
openssl req -noout -modulus -in example.csr | openssl sha256
验证证书,前提是您在计算机上将根证书和任何中间证书配置为受信任:
openssl verify example.crt
当您有中间证书链时,验证证书。根证书不是捆绑包的一部分,应该在您的机器上配置为受信任的。
openssl verify -untrusted intermediate-ca-chain.pem example.crt
验证证书,当您有中间证书链和根证书时,未配置为受信任的证书。
openssl verify -CAFile root.crt -untrusted intermediate-ca-chain.pem child.crt
验证远程服务器提供的证书是否涵盖给定的主机名。有助于检查您的多域证书是否正确涵盖了所有主机名。
openssl s_client -verify_hostname www.example.com -connect example.com:443
启动 nginx 服务测试
┌──[root@vms.154.liruilongs.github.io]-[/etc/pki/nginx]
└─$systemctl start nginx
访问测试,自签名的证书
如果觉得我的文章对您有用,请点赞。您的支持将鼓励我继续创作!
赞2作者其他文章
评论 1 · 赞 7
评论 0 · 赞 4
评论 0 · 赞 2
评论 0 · 赞 3
评论 0 · 赞 3
添加新评论0 条评论